
Single
One tablet for one person. Standard layout with a single set of name, dates, and epitaph.

How it works
A clear path through the memria editor — template, shape, stone, laser, and export — without the noise of a full product manual.
Monument types
Set when you create a project — this cannot be changed after creation.
One tablet for one person. Standard layout with a single set of name, dates, and epitaph.
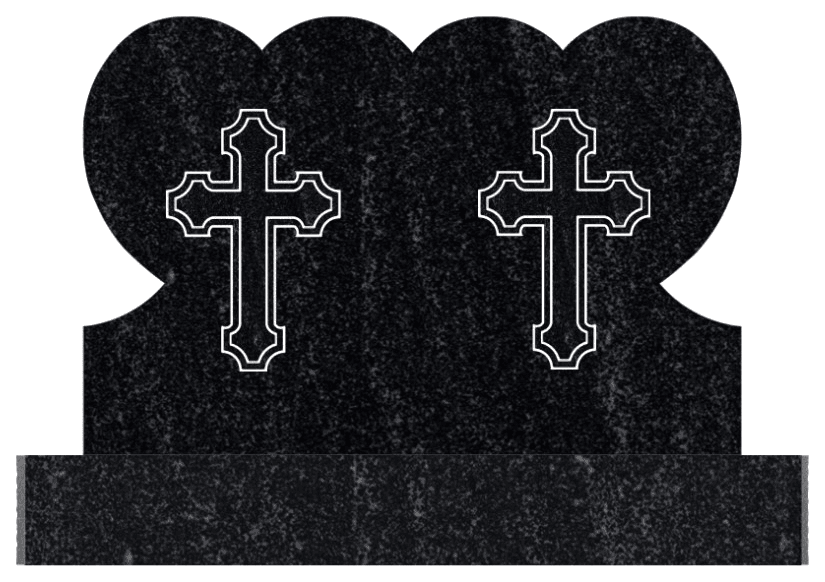
Two tablets on a shared base, each with its own independent canvas. For couples and family plots.
The path
Every project follows the same order in the editor. Jump to any step below to see it in detail.
Step 01 — TEMPLATES
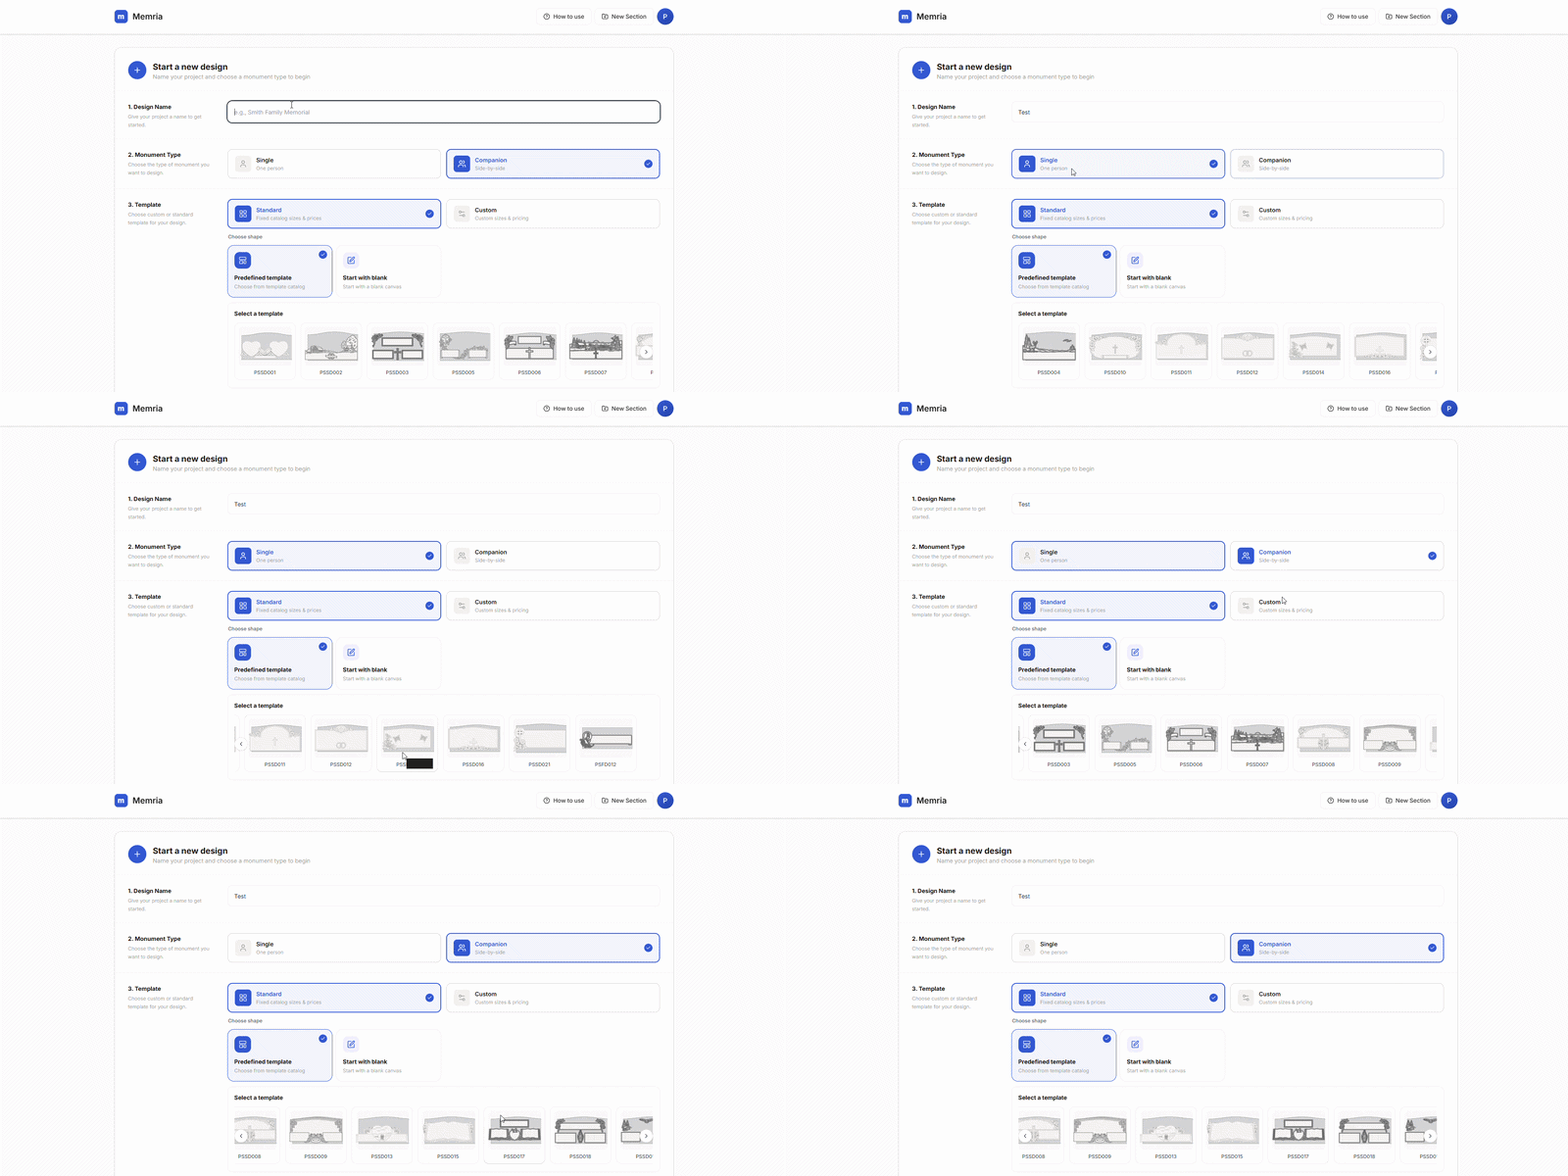
When you start a new design, choose Standard, then Predefined template. Browse the template catalogue and pick a silhouette — catalog sizes and pricing are applied automatically so you begin on a production-ready shape.
Step 02 — SHAPE & STYLE
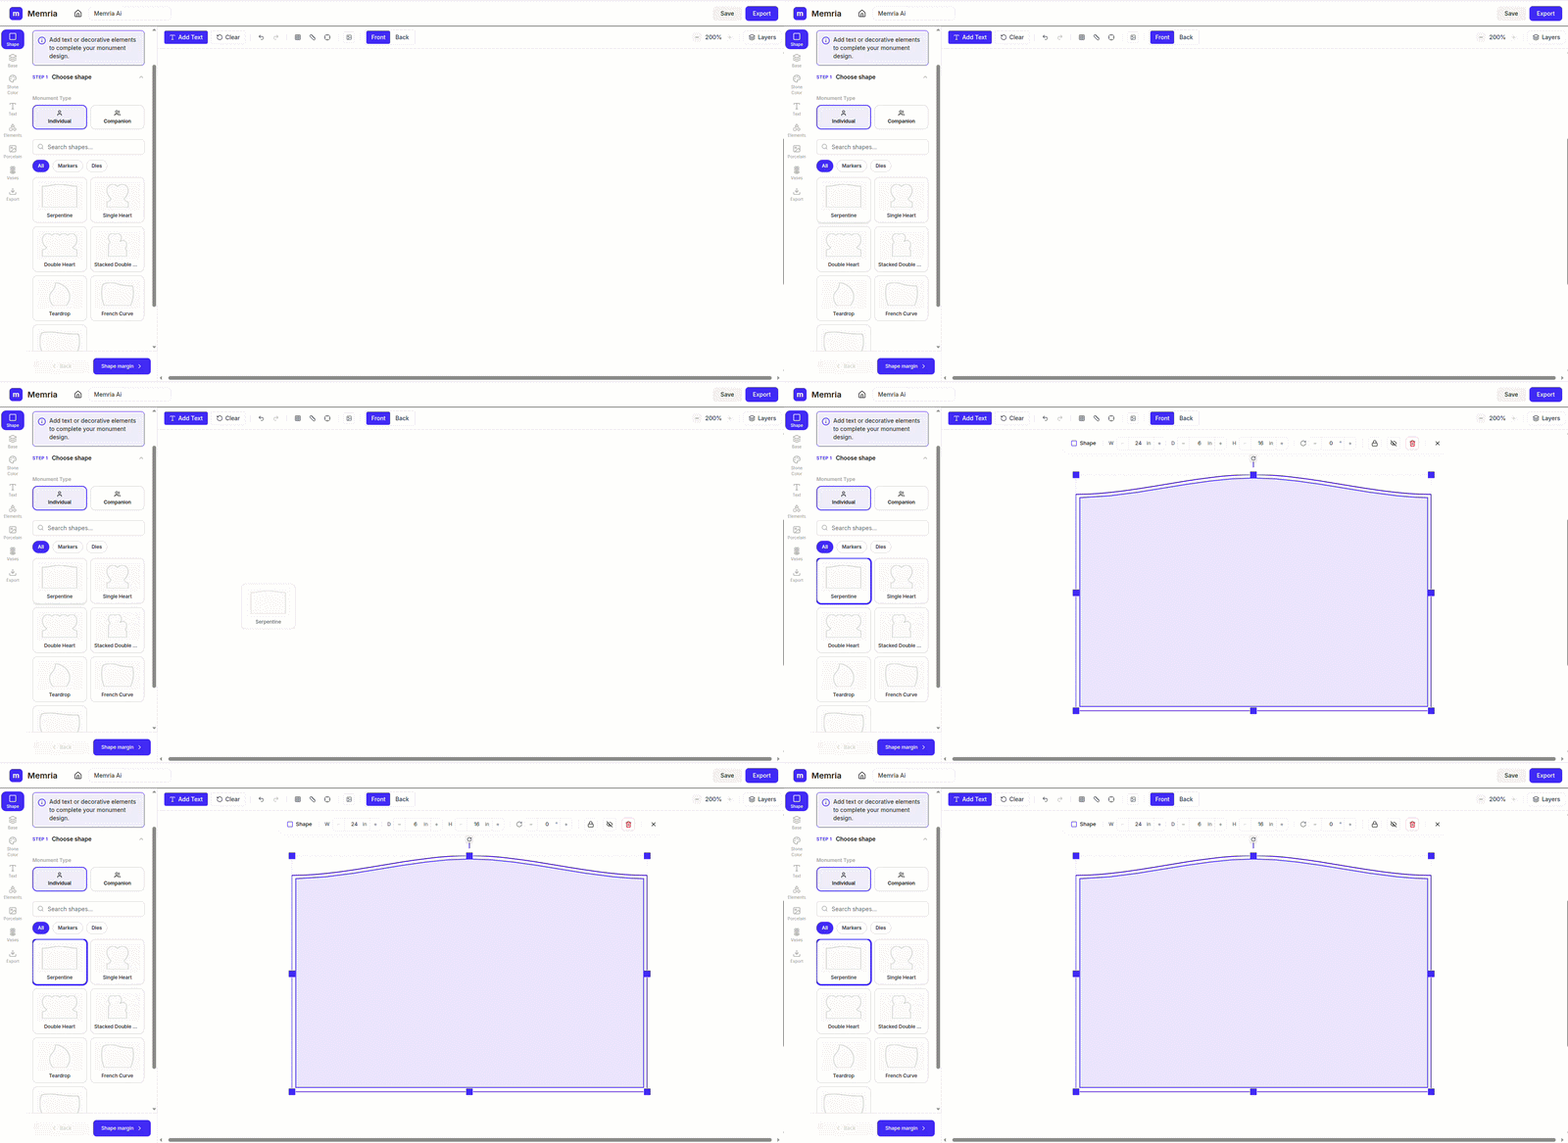
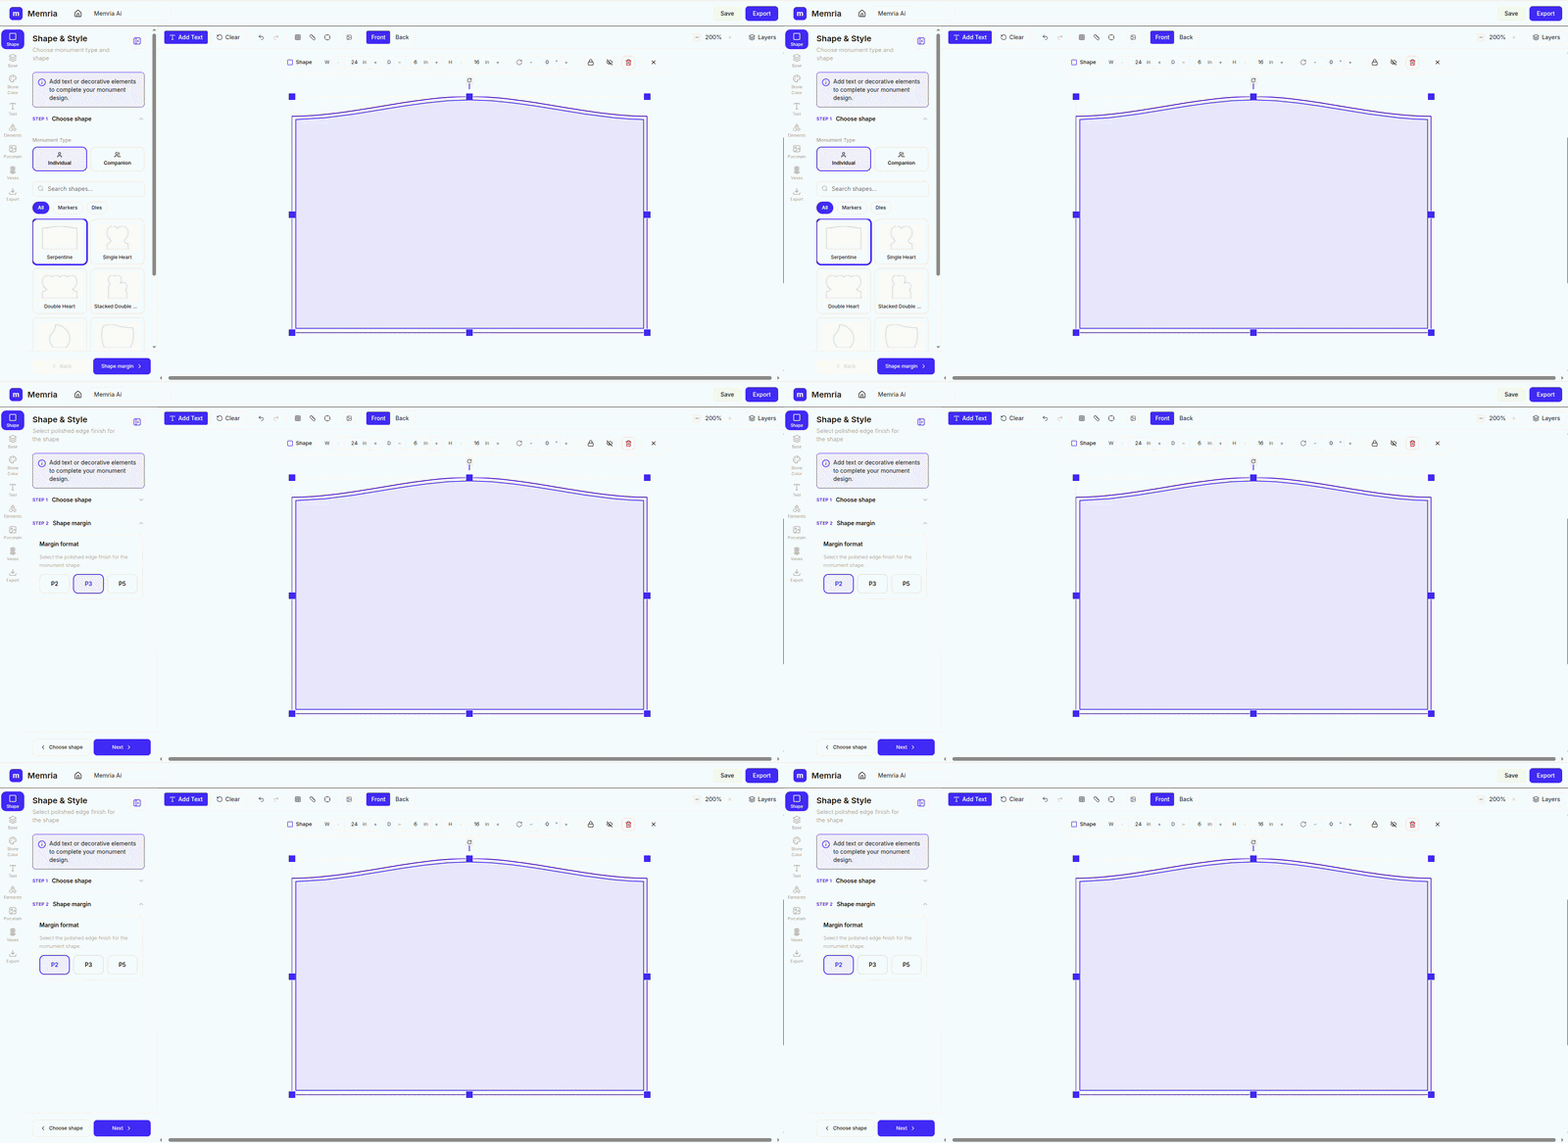
The Shape panel has three steps. First, pick a silhouette from the searchable shape library — browse by category or search by name. Next, choose the catalog size from the size dropdown. Then set the polished finish (P1–P5 depending on shape) so the canvas reflects the correct finish before you move on.
Step 1 — Choose shape
Step 03 — BASE
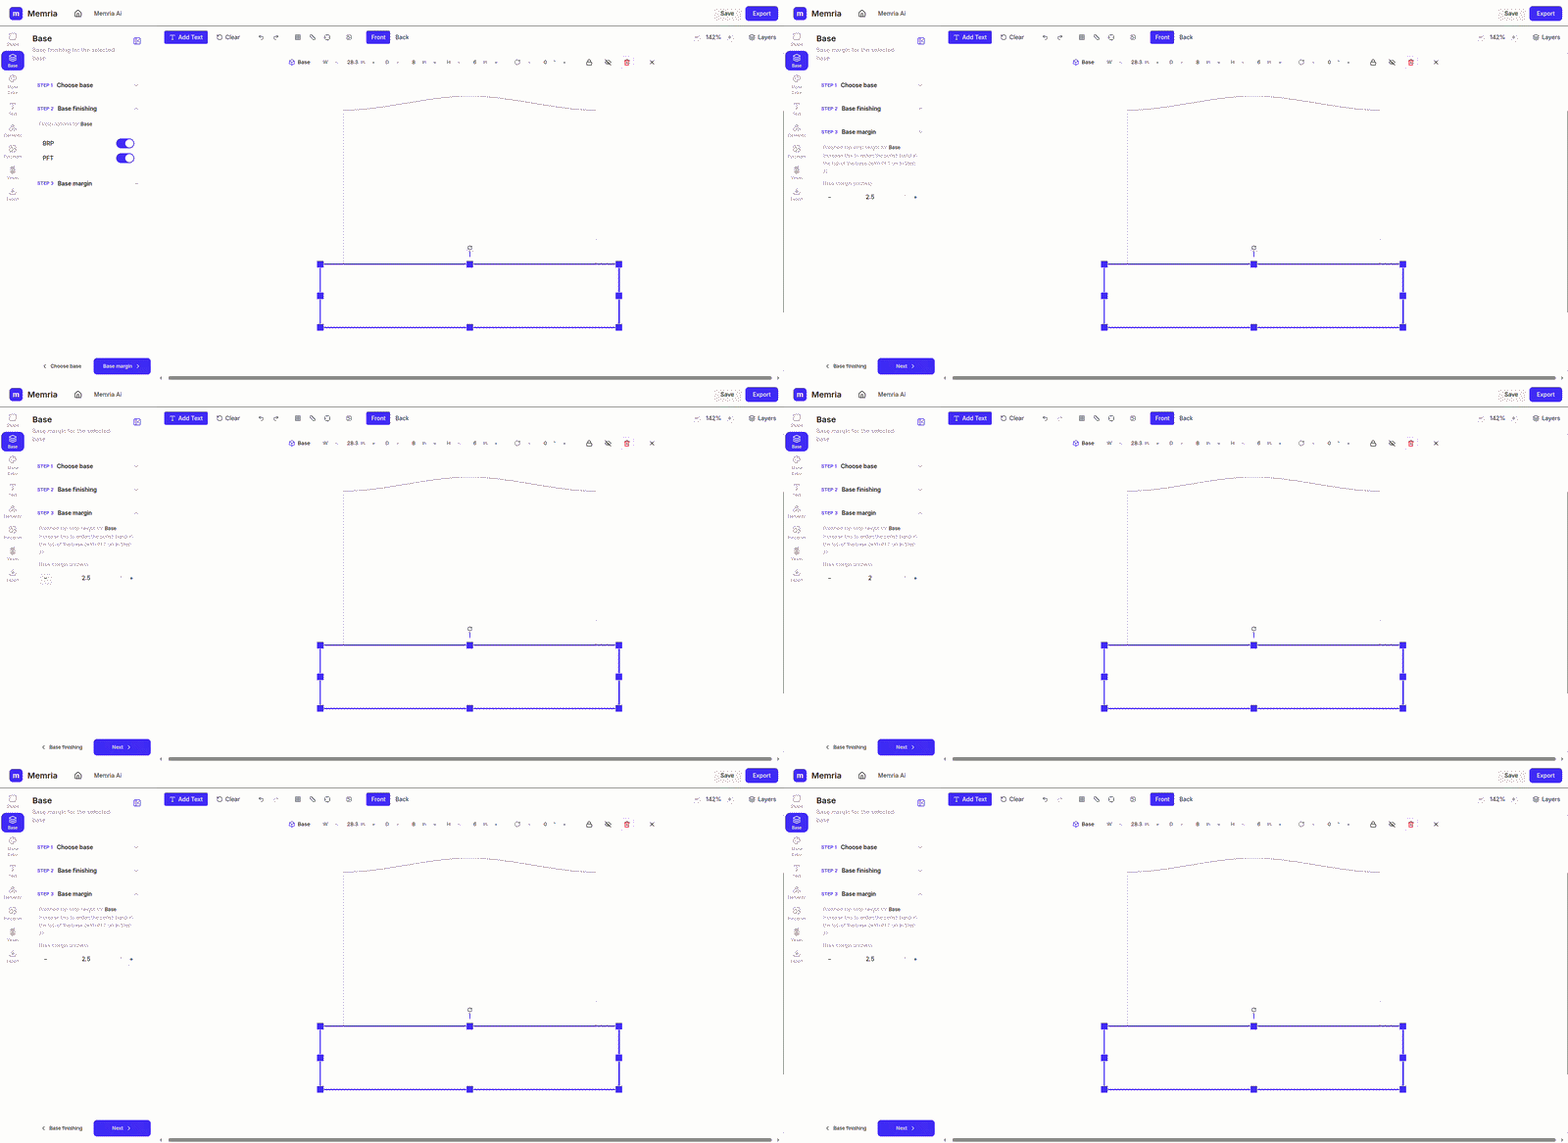
Add a main base and stack sub-bases for a tiered composition. Step 2 picks the catalog size for the selected layer — the same size dropdown as Shape. Step 3 sets base finishing toggles (BRP and PFT). Step 4 sets the base margin to 0″ or 2″.
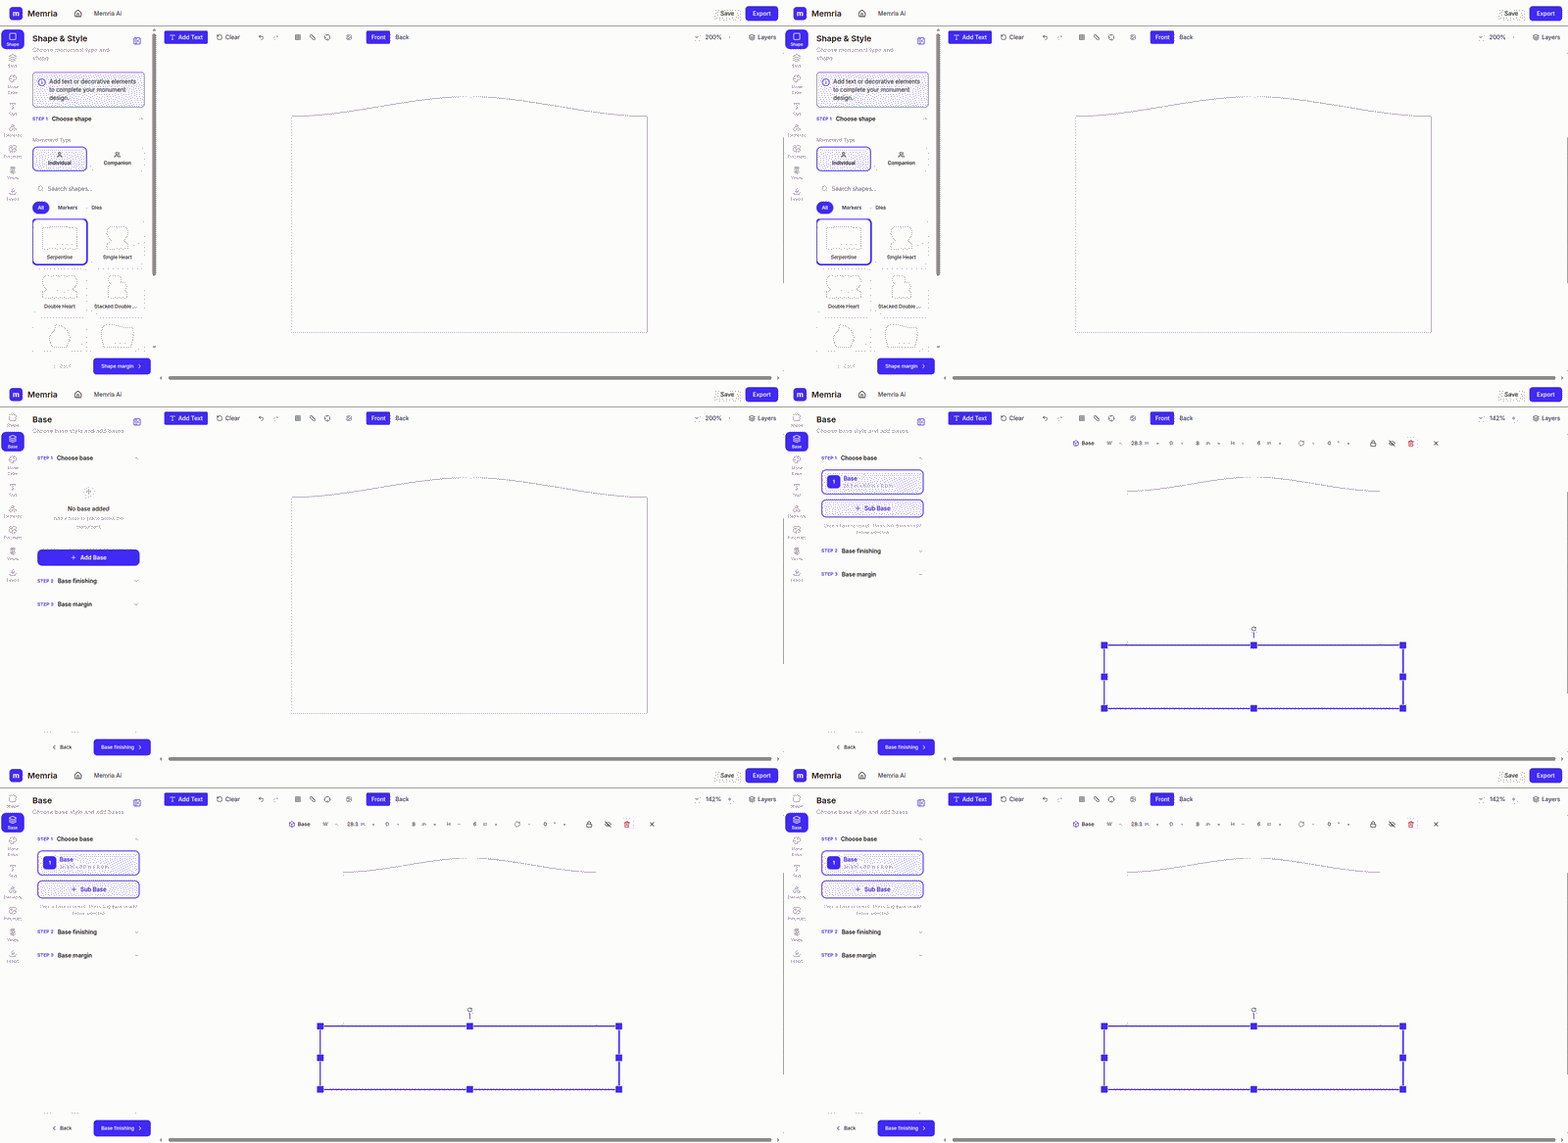
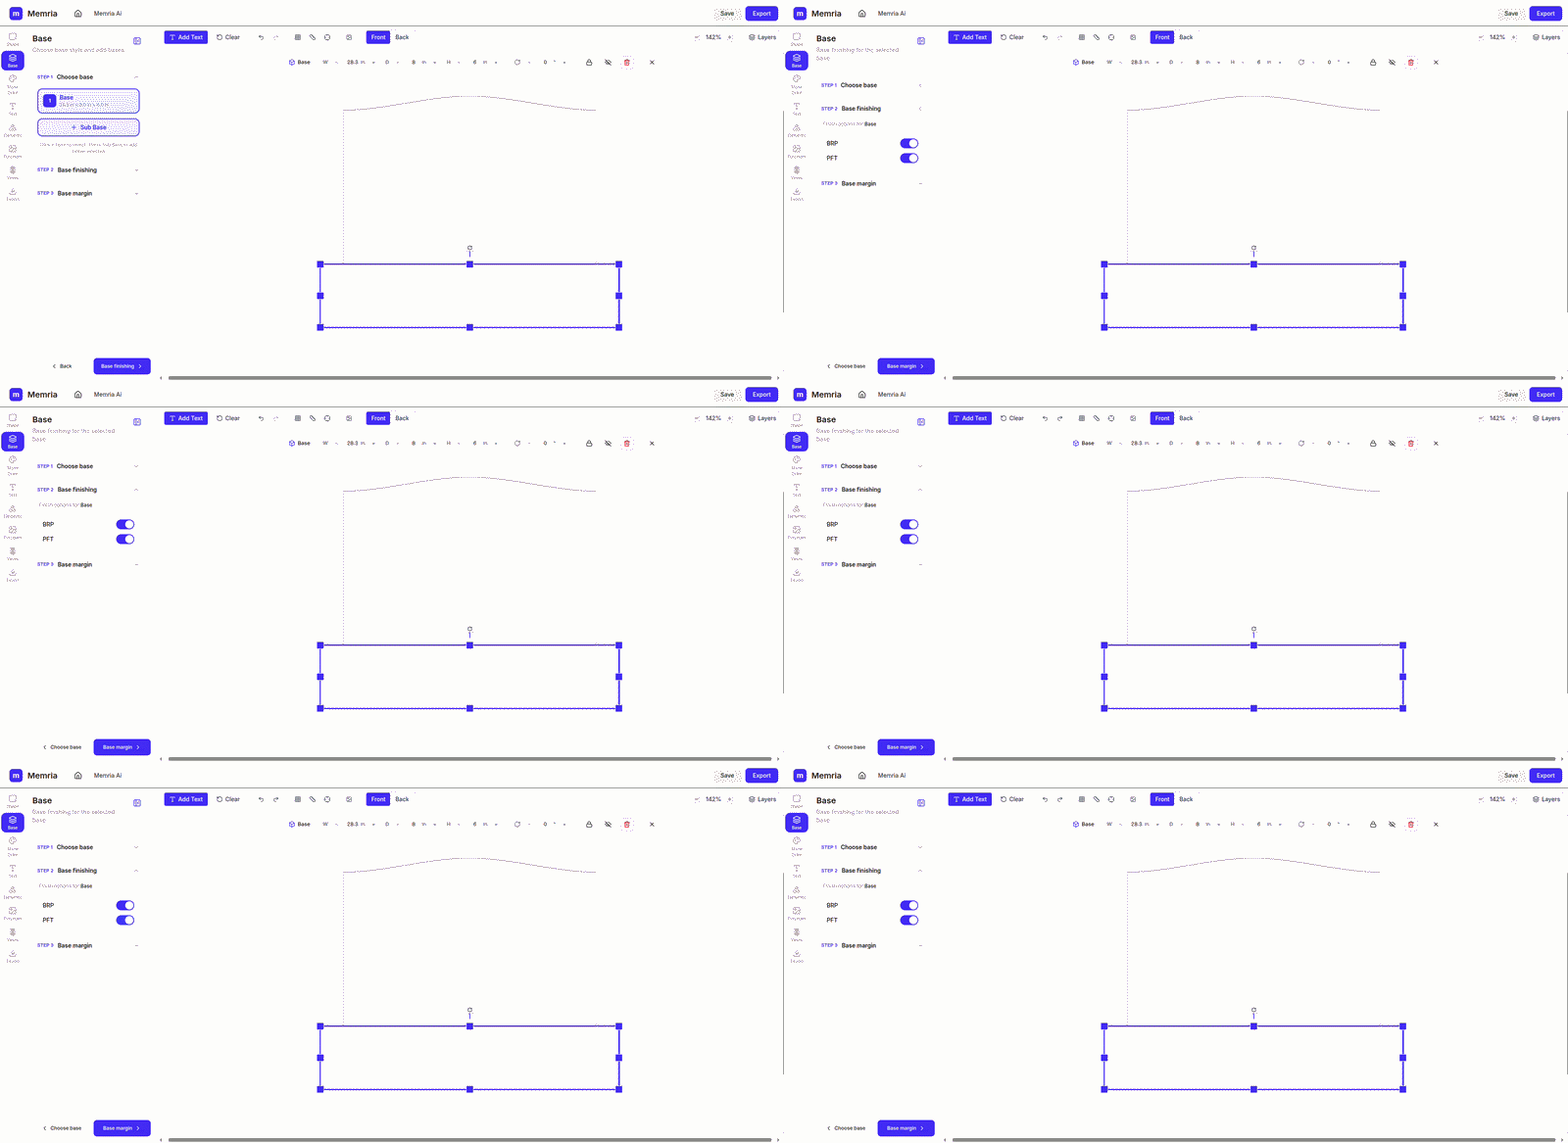
Step 1 — Choose base
Step 04 — STONE COLOR
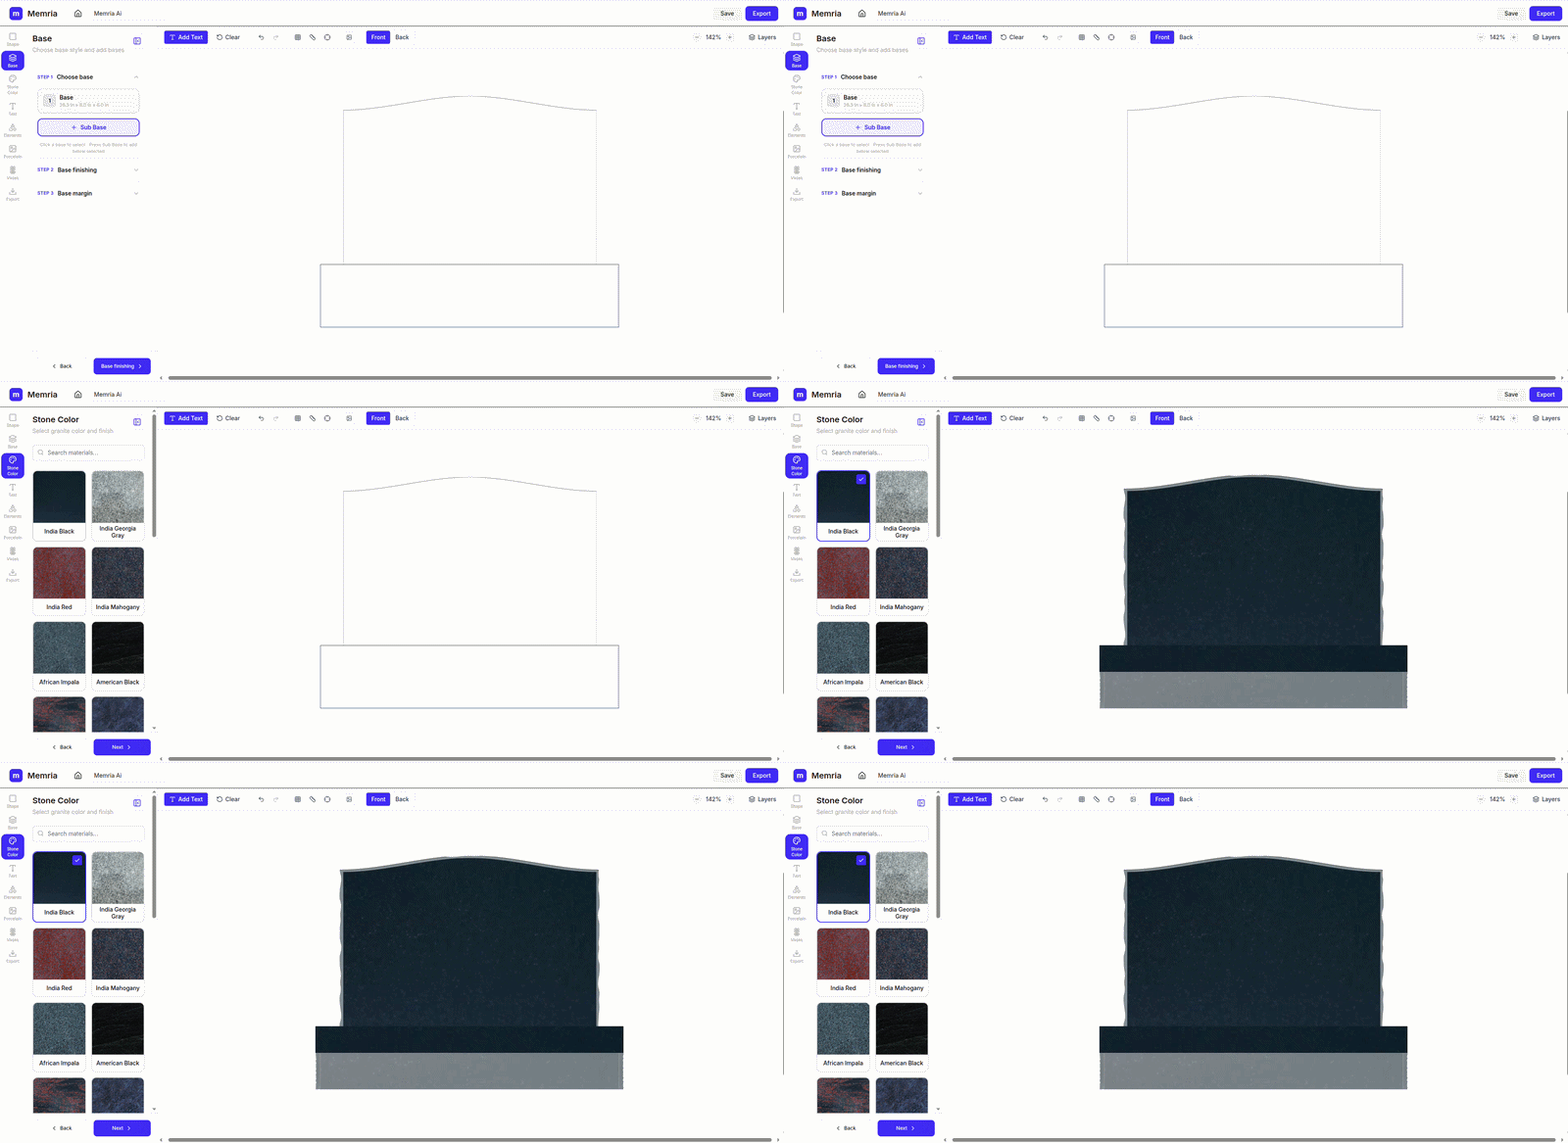
Browse the searchable stone color library — each swatch shows the real granite texture. Switch the target between Shape and Base to apply different stone colors to the tablet and the base independently. The canvas updates as soon as you select.
Step 05 — TEXT
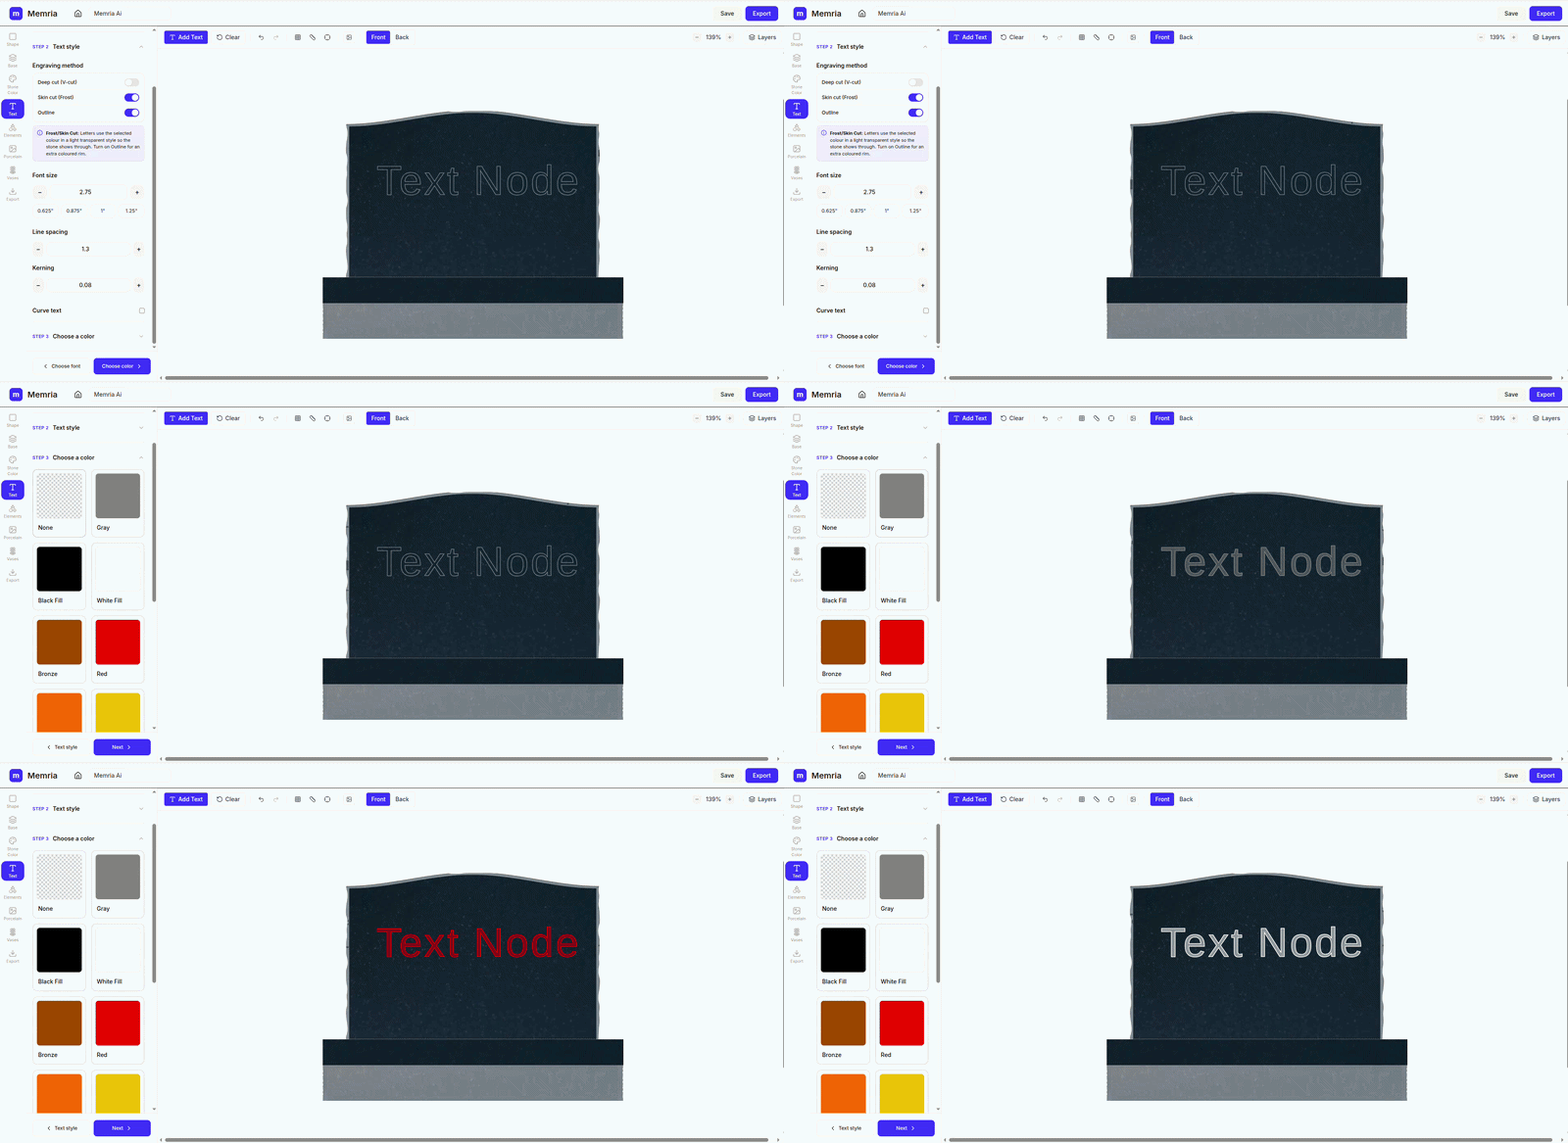
The Text panel walks through three steps. Choose a memorial typeface from the curated catalogue, then set engraving method (V-Cut, Frost, or Skin Cut), size, line spacing, kerning, and outline. Step 3 picks the engraving colour for all text — Gold Leaf, White Fill, Bronze, and more.
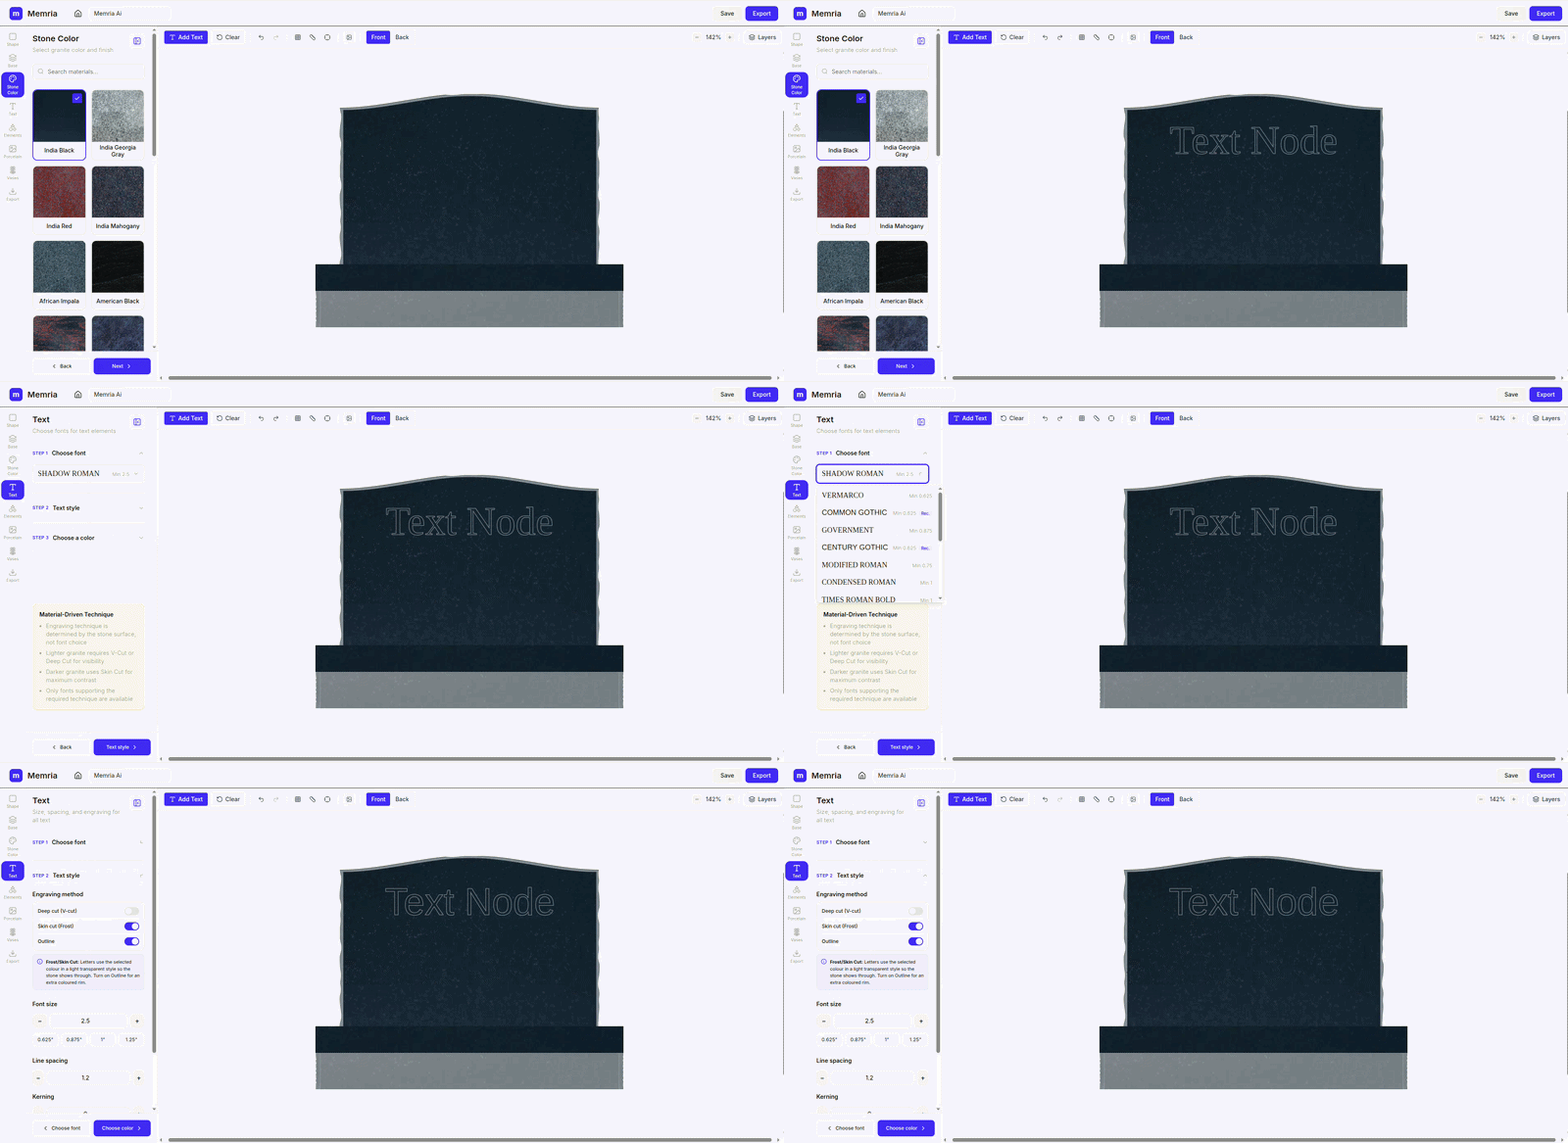
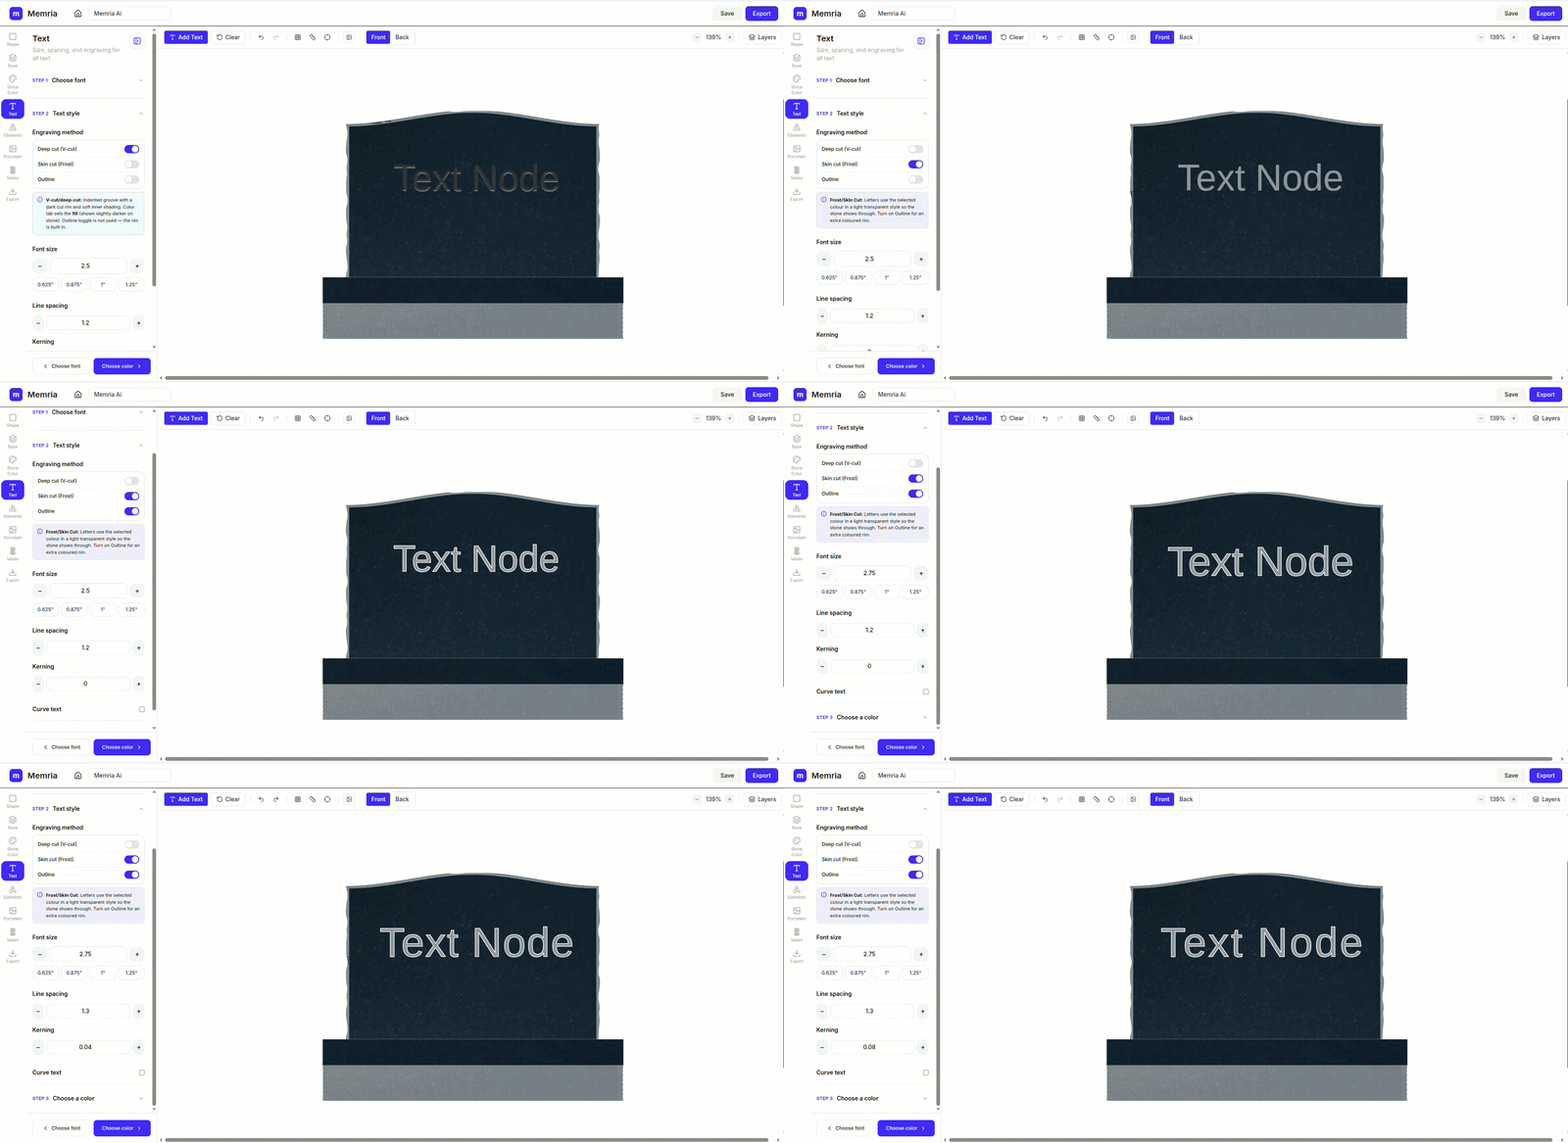
Step 1 — Choose font
Step 06 — ELEMENTS
Browse the elements library and click or drag motifs onto the canvas — crosses, doves, roses, and more. With an element selected, set its finishing style, carving style, and engraving colour in steps 2–4. Drag to position and use resize handles to scale on the canvas.
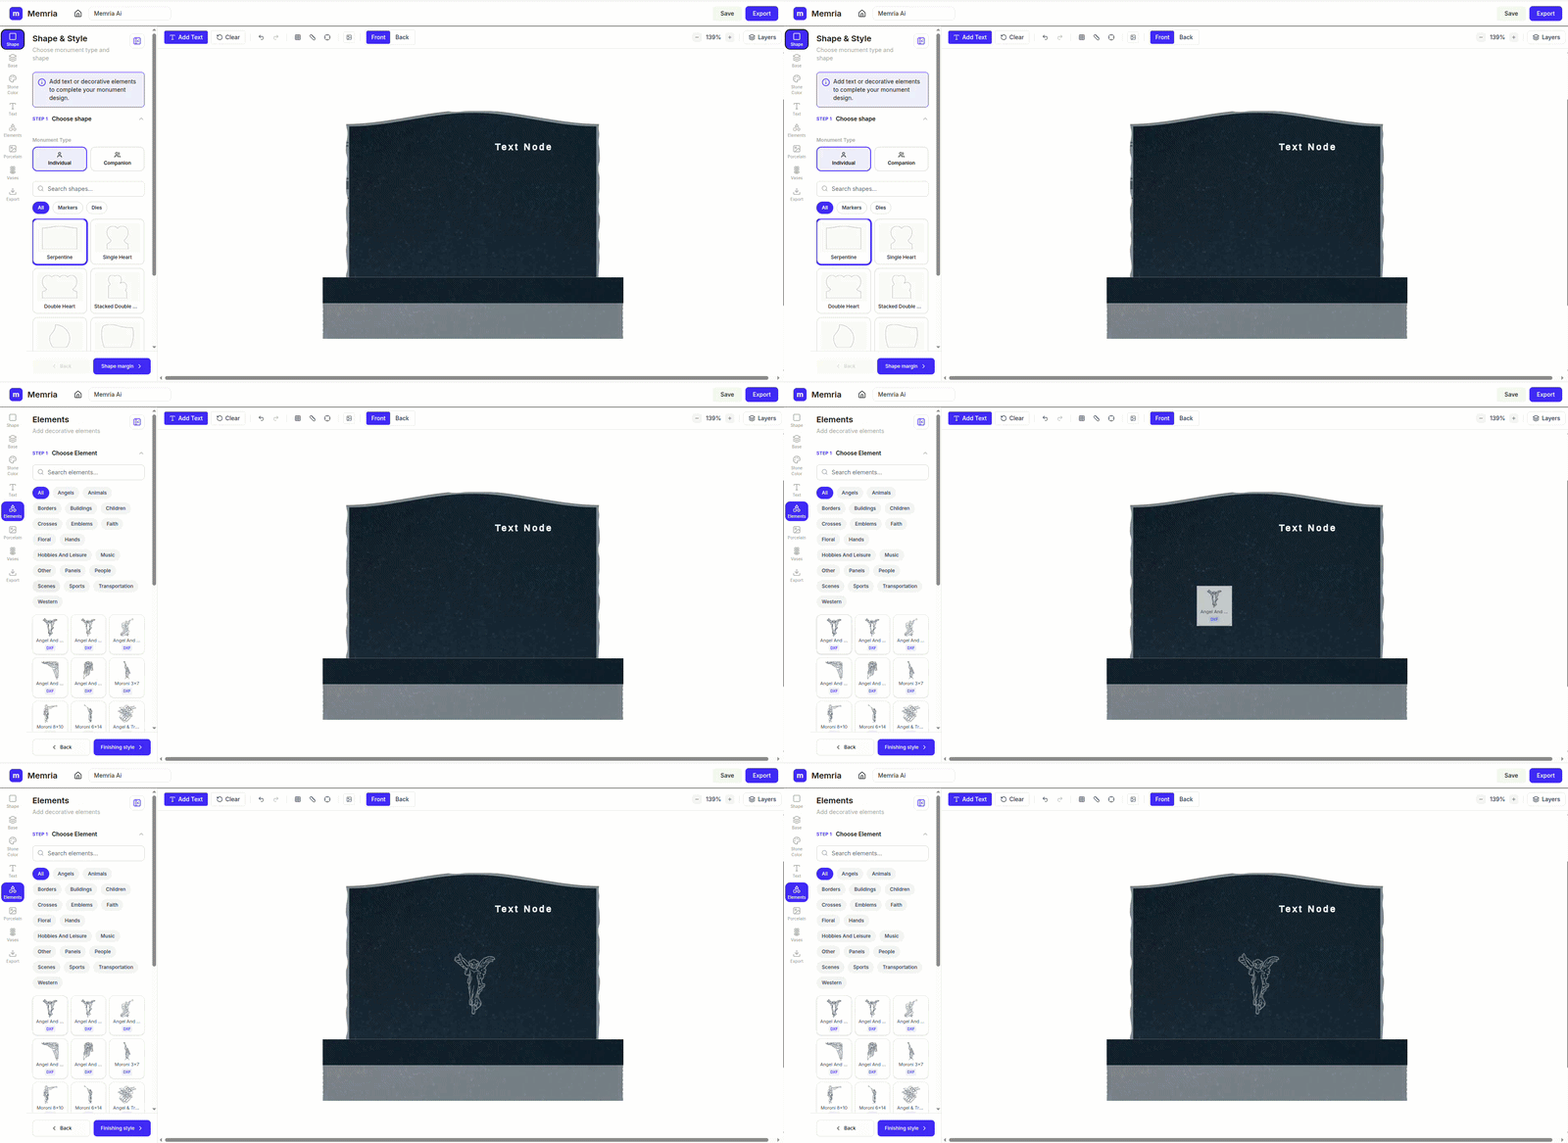
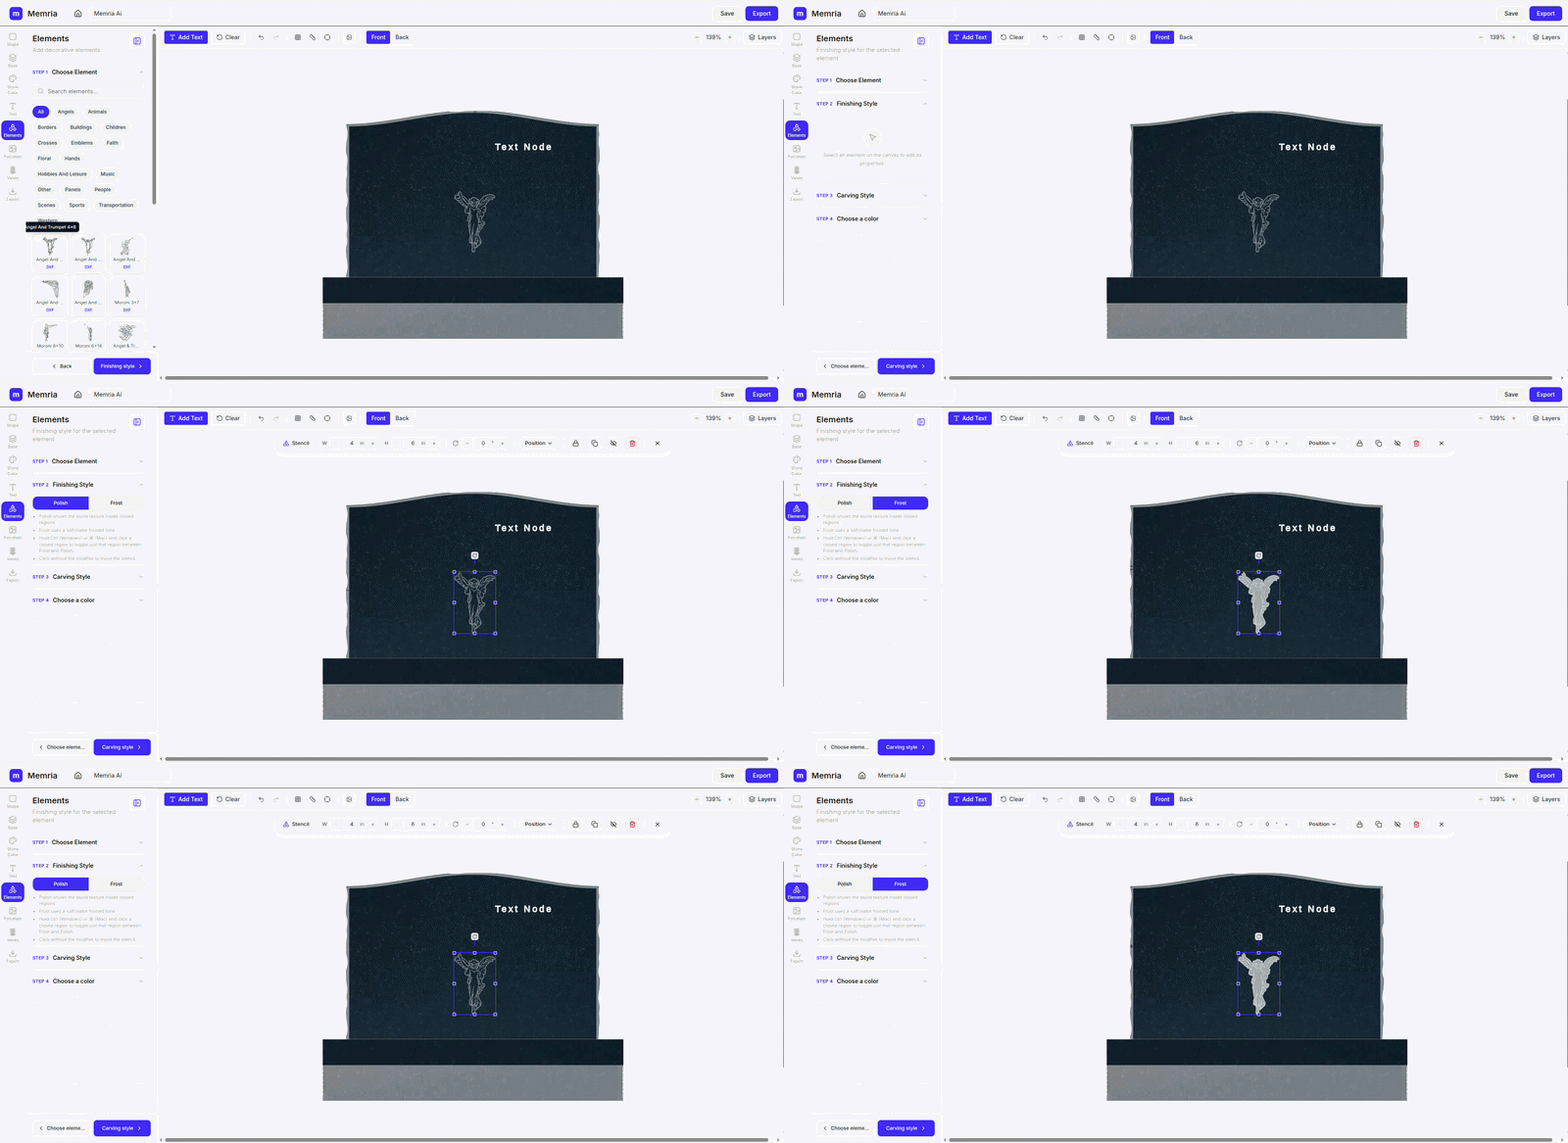
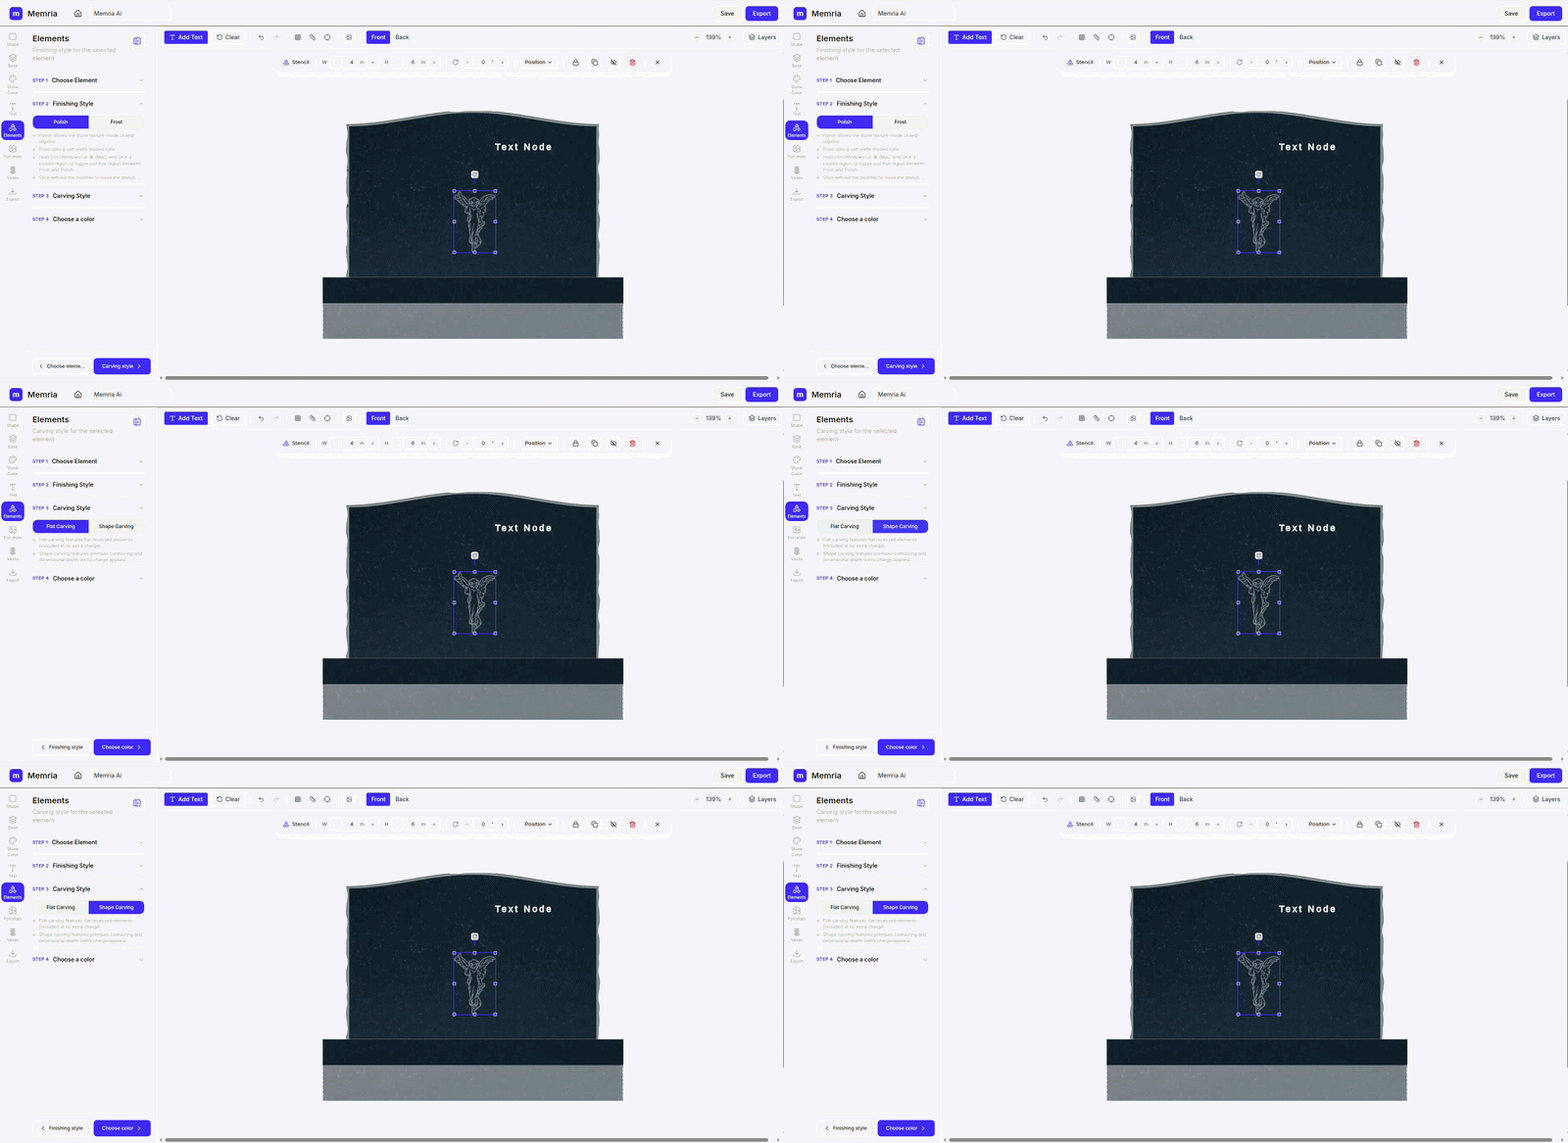
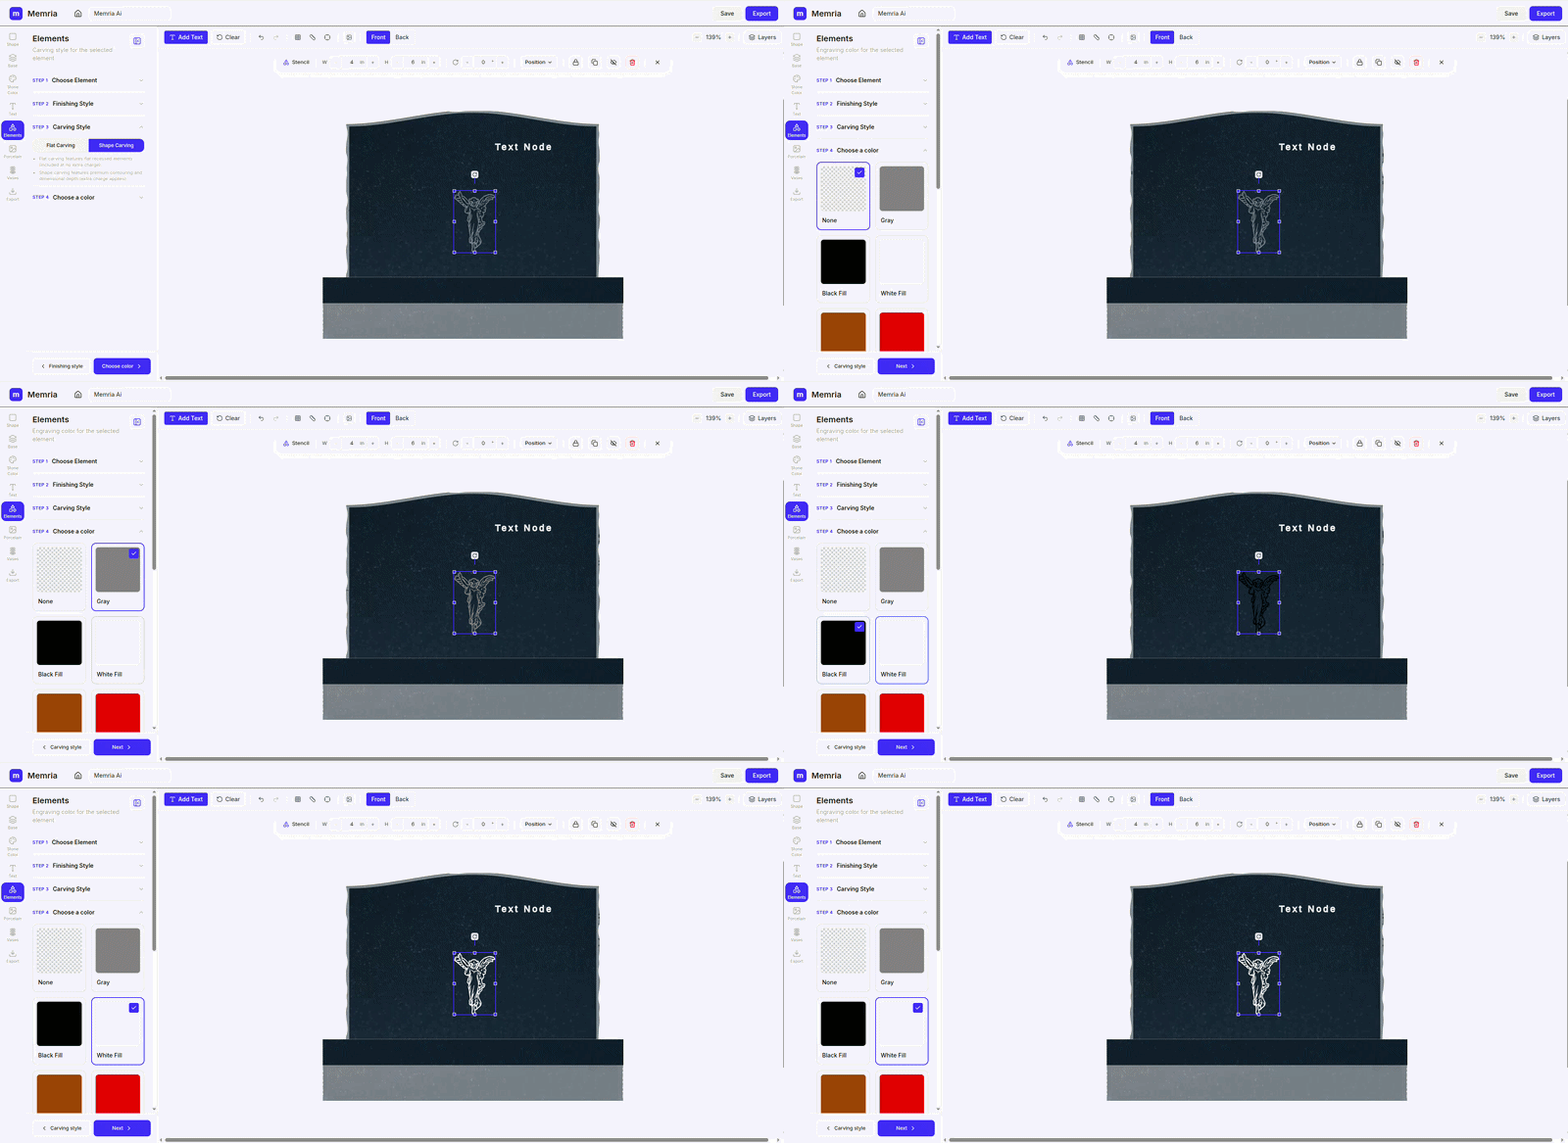
Step 1 — Choose element
Step 07 — PORCELAIN
Drag a plaque shape — Oval, Rectangle, Heart, Circle, or Square — onto the stone, then select it and upload a portrait to drop the photo inside. Reposition and resize the plaque freely, and skip the step entirely if the order has no porcelain.
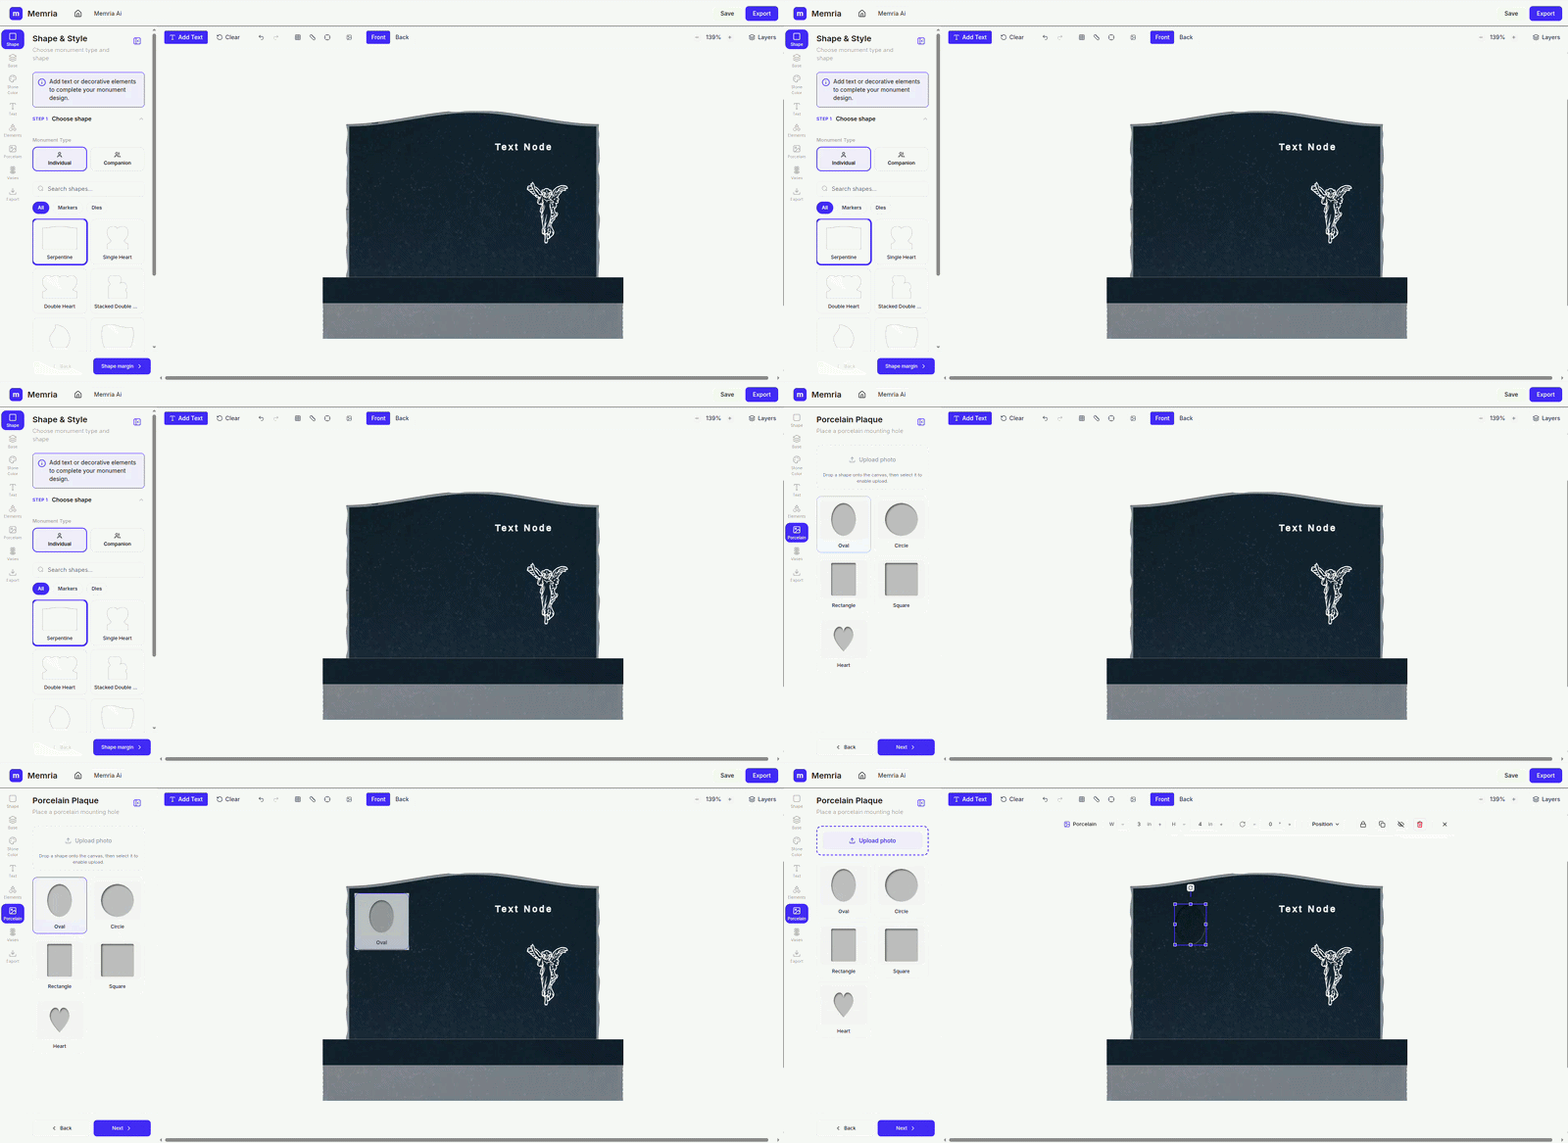
Step 08 — LASER ENGRAVING
Browse the Laser Engraving gallery by category, or upload your own photo, QR code, or signature. Drag artwork onto the stone, then crop, remove the background, pick a portrait shape, and tune lighting before you finalise placement.
Step 09 — VASES
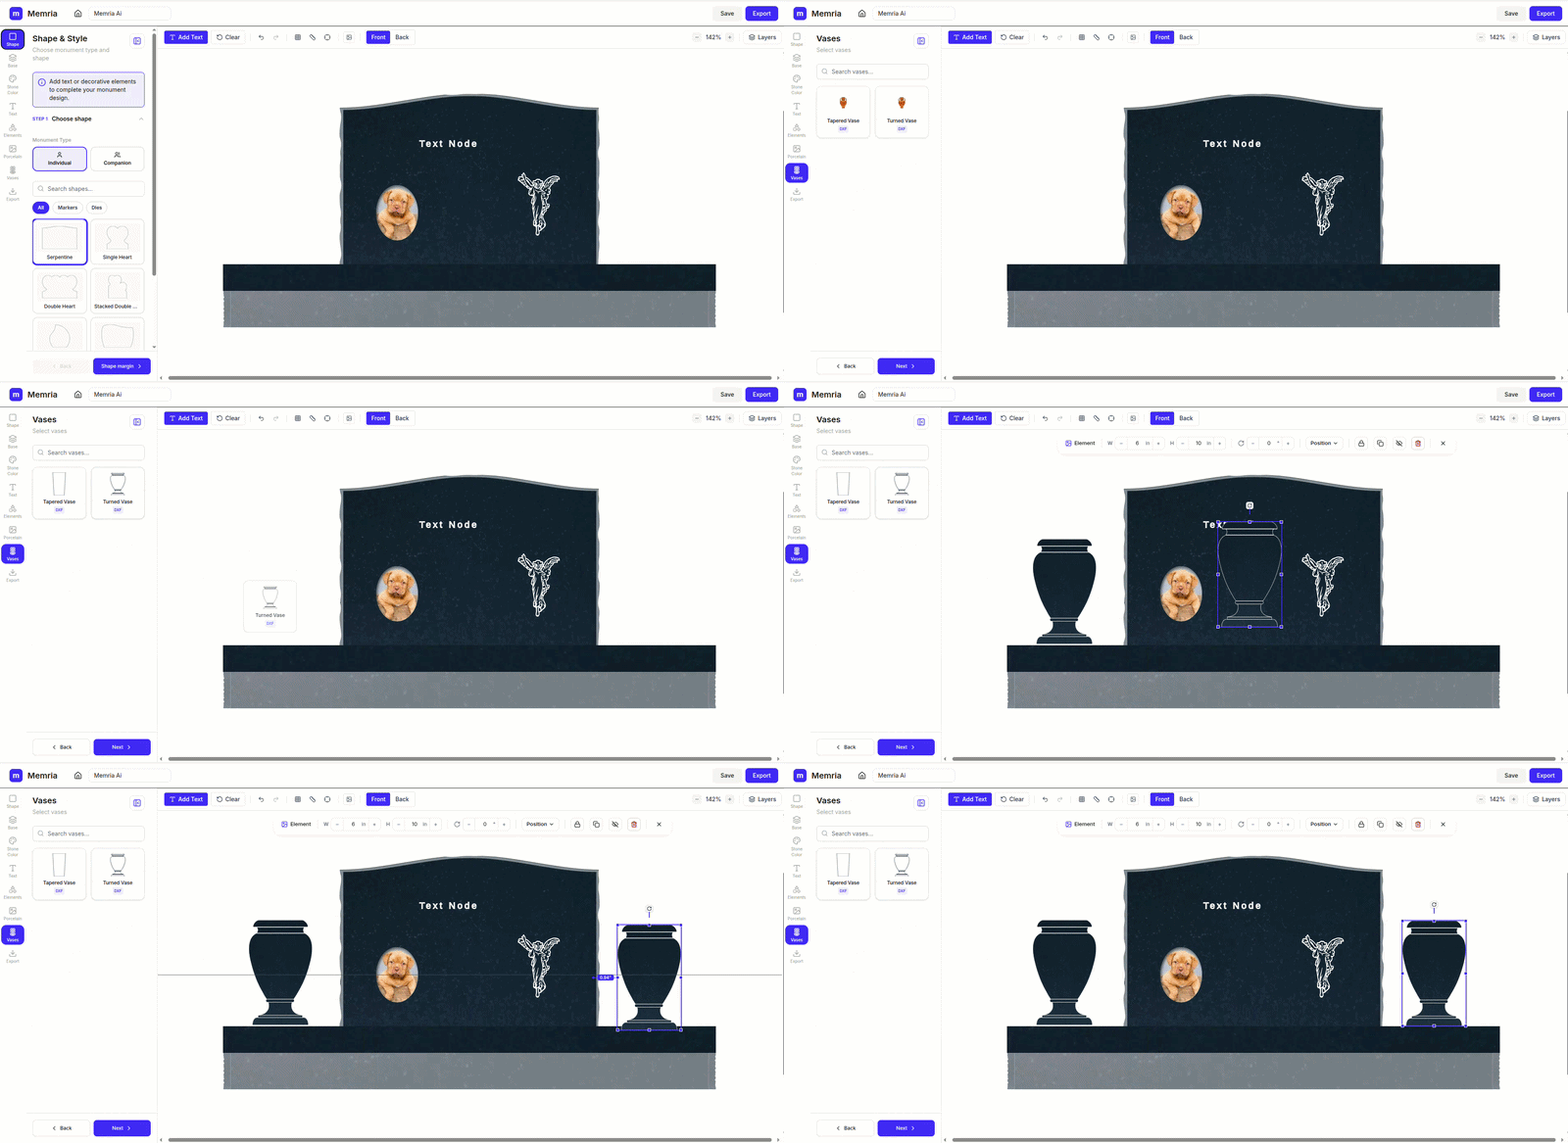
Search the vase catalogue and click a vase to add it to the canvas. Each vase shows its real dimensions in inches. Drag to position and resize with the handles — vases sit alongside text and decorative elements in the layer stack.
Step 10 — EXPORT
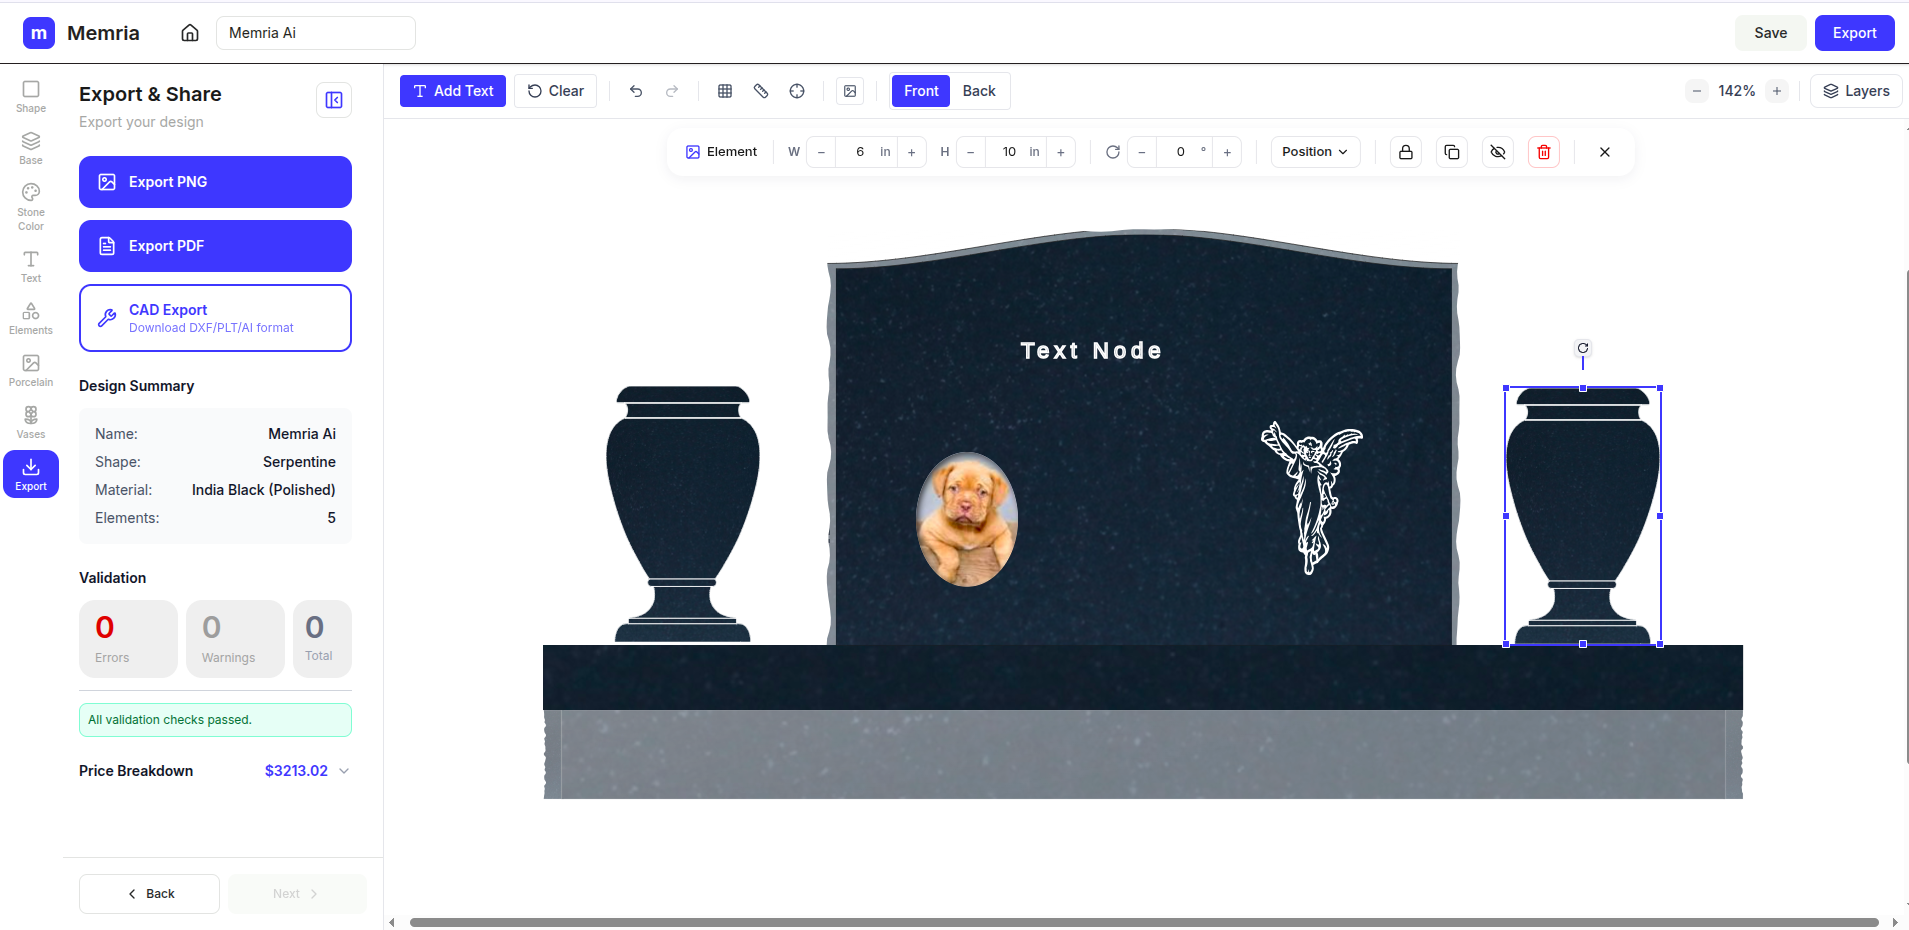
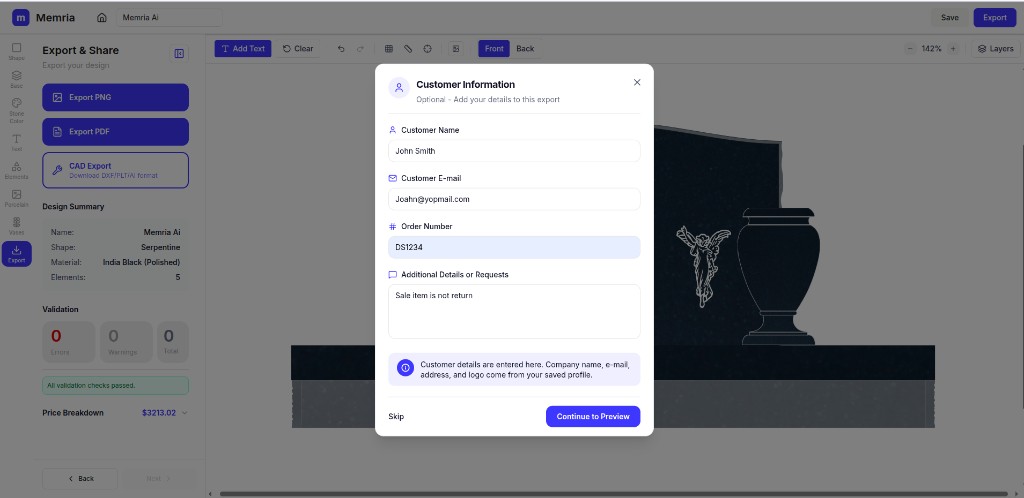
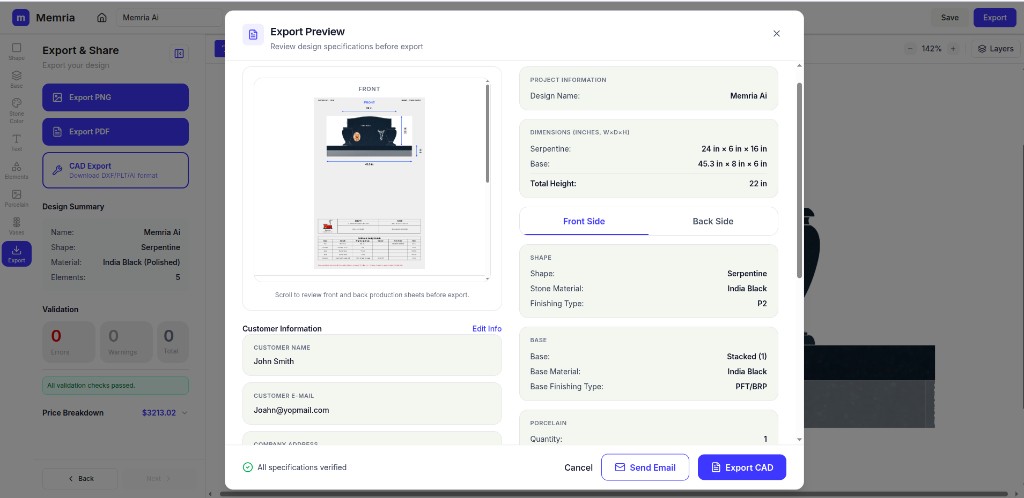
The export panel summarises the design — name, shape, material, and element count — and runs validation for errors and warnings. Once every check passes, export PNG sheets or a PDF for sign-off, or download the CAD package (DXF/PLT/AI) for the workshop.
Export & Share
FAQ
A Single monument is one tablet for one person. A Companion monument is two tablets on a shared base — each tablet has its own independent canvas. Both sets appear on the final proof.
The export panel validates your design and flags anything that may not survive production — such as text below the minimum size for the chosen engraving method. Resolve every error and warning before exporting so the file is production-ready.
Yes. Use the Front / Back toggle in the canvas toolbar to switch faces. Each face has its own layout, and both are included when you export PNG sheets or a PDF proof.
Open the Layers panel and drag elements up or down to change the stacking order. You can also lock an element so it cannot be moved, or hide it while you work on the rest of the design.
Engraving colour is set in the Text panel (Step 05) for all text, and in the Elements panel (Step 06) for decorative motifs. Select an element on the canvas to adjust its individual colour in the Elements steps.
You can choose V-Cut, Frost, or Skin Cut in the Text panel. Frost and Skin Cut support an Outline toggle for an extra coloured rim. Minimum-size warnings flag any text that is too small for the chosen method.
When starting a new design, choose Standard under Template, then Predefined template. Scroll the catalogue, pick a silhouette, and continue — catalog sizes and pricing are applied automatically. Use Start with blank if you prefer an empty canvas.
Open the Laser Engraving panel to browse gallery artwork by category, or upload a custom photo, QR code, or signature. Drag artwork onto the stone, then crop, remove the background, choose a portrait shape, and adjust lighting before you finalise.
Designs are saved to your account as projects — the editor auto-saves a few seconds after you pause (and when you leave the tab), and you can also save manually. Open the Projects page any time to reopen, duplicate, or continue a design.
Open the full editor and walk the same path — from template to a validated export.
No credit card required · Free trial available